Custom Domains
Mailsac lets you configure a custom domain to receive email at any address within the domain, while keeping mail private. Mail can be fetched via API, the web interface (Inbox View), unified inbox (Unified Inbox), or POP3 (Reading with POP3). Access to the email is limited to Team Users(Team Users) and the Primary Account Holder by default.
Custom domains have the advantage higher inbound message throttling limits, greater storage limits, and a Catch-All address. Optionally, Custom domains can be set to public.
Custom domains are included with paid subscriptions. Additional domains may be added to paid subscriptions.
Zero-Setup Subdomain
The Zero-Setup Subdomain automatically creates a subdomain under msdc.co (eg test123.msdc.co).
It is ready to receive and send email with no additional setup.
This is the ideal option if you do not already own a domain - or do not have access to change the DNS records for a domain.
BYODomain
BYODomain (Bring Your Own Domain) allows you to easily receive email with a domain or subdomain you already own.
If you do not already own a domain you can use our Zero-Setup Subdomain. Alternatively, you can purchase a domain from a registrar (Namecheap or GoDaddy are popular) and configure it for use with Mailsac.
The exact method for adding DNS records will depend on your DNS hosting provider. Your IT department may be able to assist with this. Links to configuring DNS records for popular DNS solutions are found at the bottom of this page.
Zero-Setup Subdomain Configuration
Adding a Zero-Setup domain only takes a few seconds.
From the Dashboard, select Custom Domains.
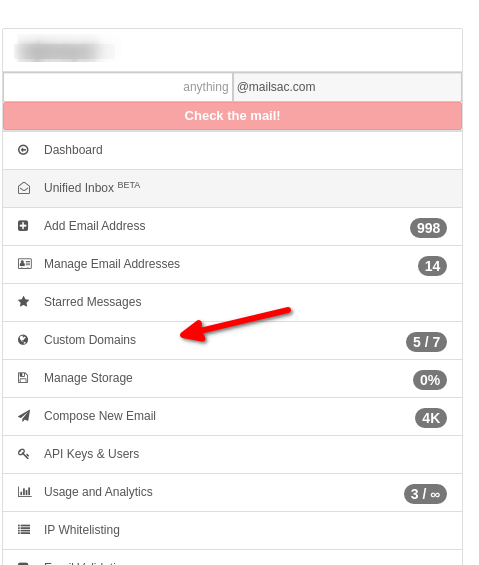
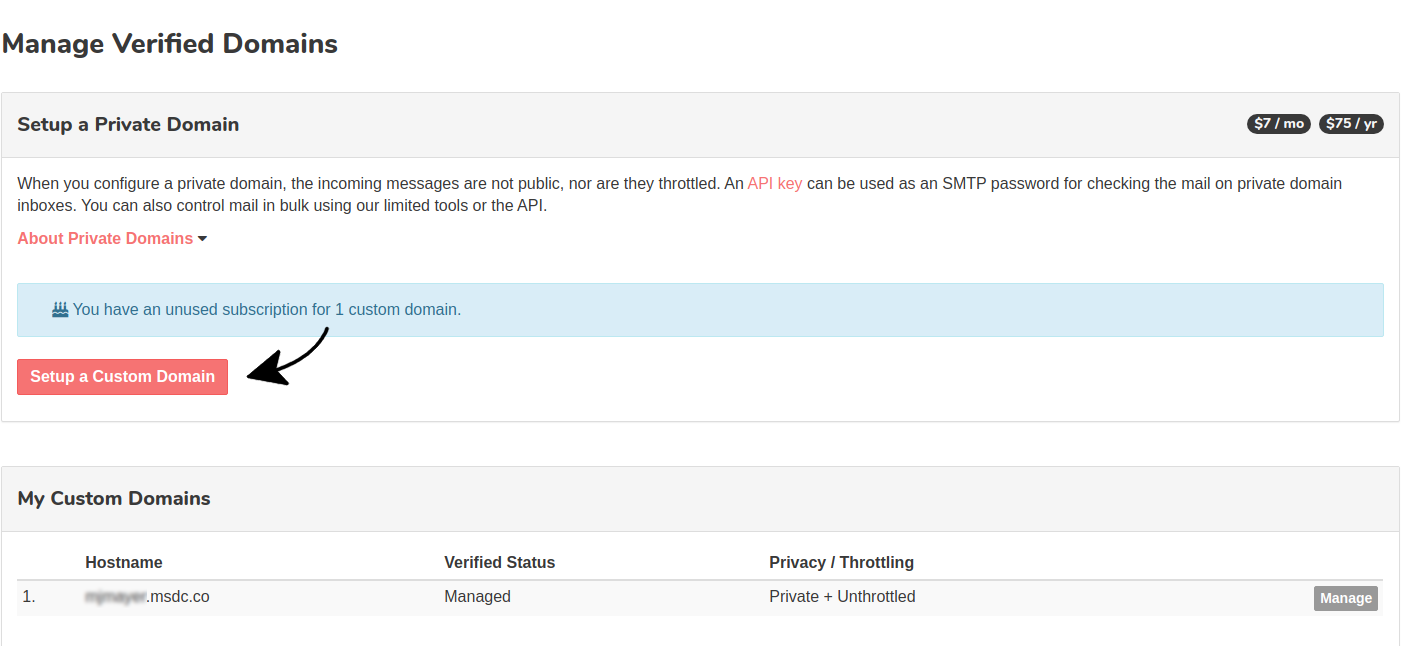
Select “Setup a Custom Domain”
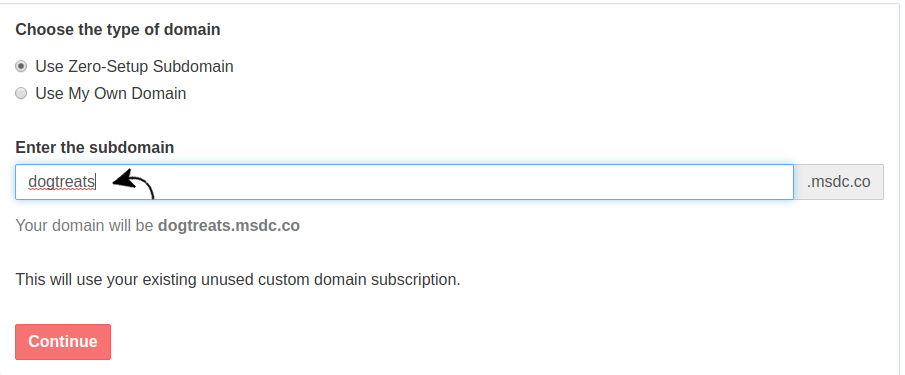
Enter a subdomain name and select continue
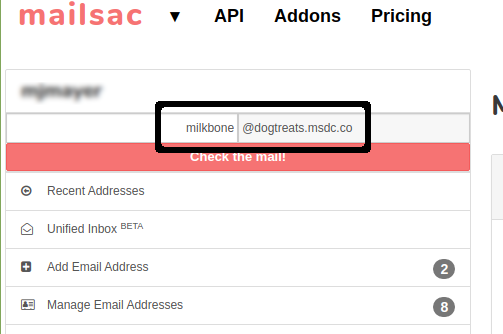
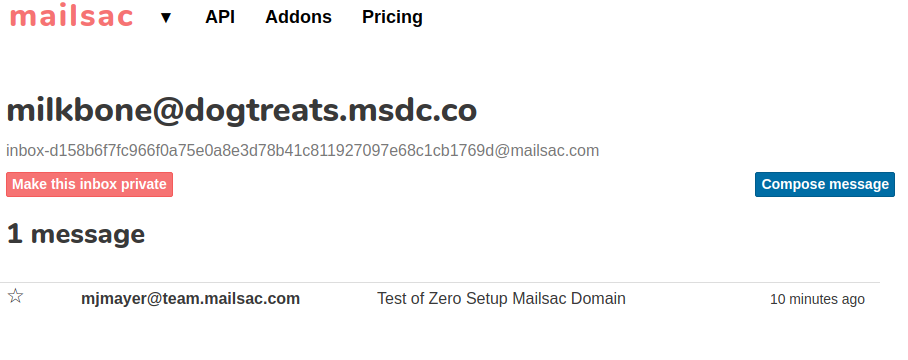
Send a test email to any address at in the custom domain. There is no need to configure individual addresses. Sending an email to the address creates the address.
Enter the email address you sent the email to.
Verify the email was received.
BYODomain Configuration
BYODomain configuration requires you to have access to modify DNS records on your domain.
Domain verification requires the addition of a TXT record to validate domain ownership.
Receiving mail requires configuring MX records. Sending mail requires configuring DKIM and SPF records.
The following sections will show how to:
Add a custom domain to Mailsac
Verify ownership of a custom domain using a TXT record
Configure a custom domain to receive mail by adding an MX record
Configure a custom domain to send mail by adding DKIM and SPF records
Adding a Custom Domain
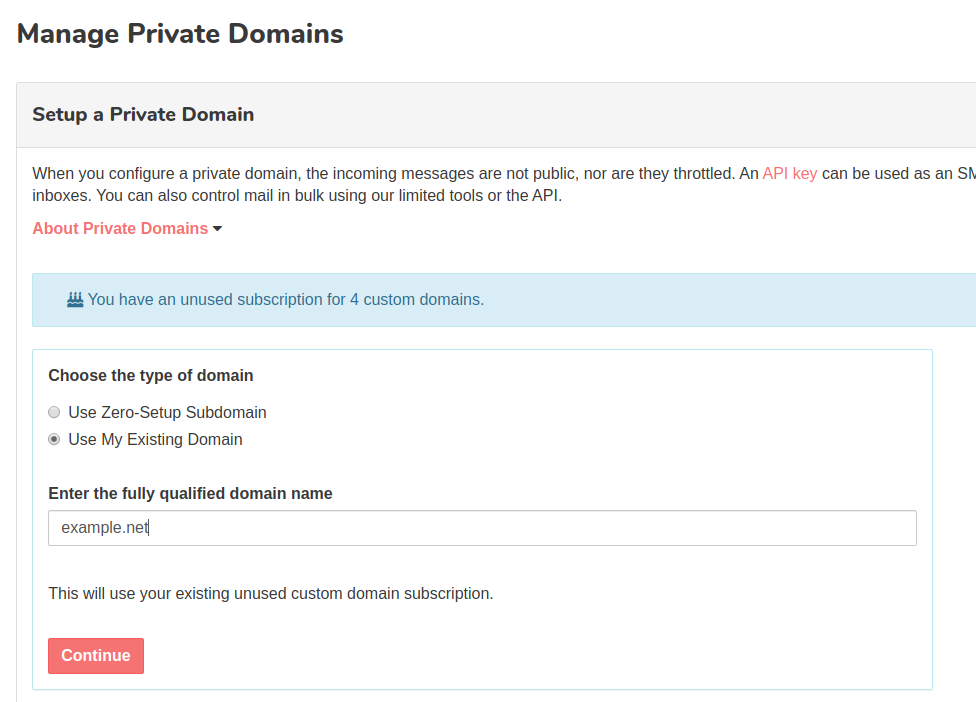
From the Dashboard, select Custom Domains.
Select “Setup a Custom Domain”
Enter the fully qualified domain name of your domain
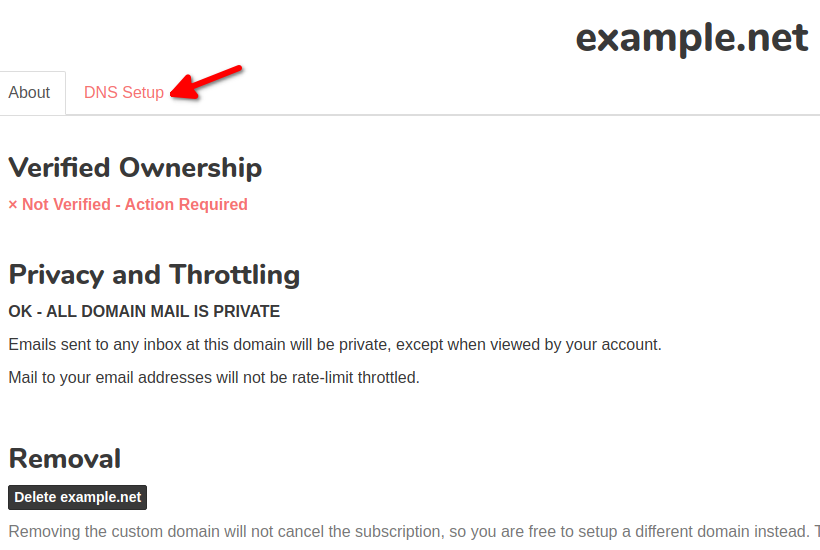
Select the DNS Setup tab to verify DNS
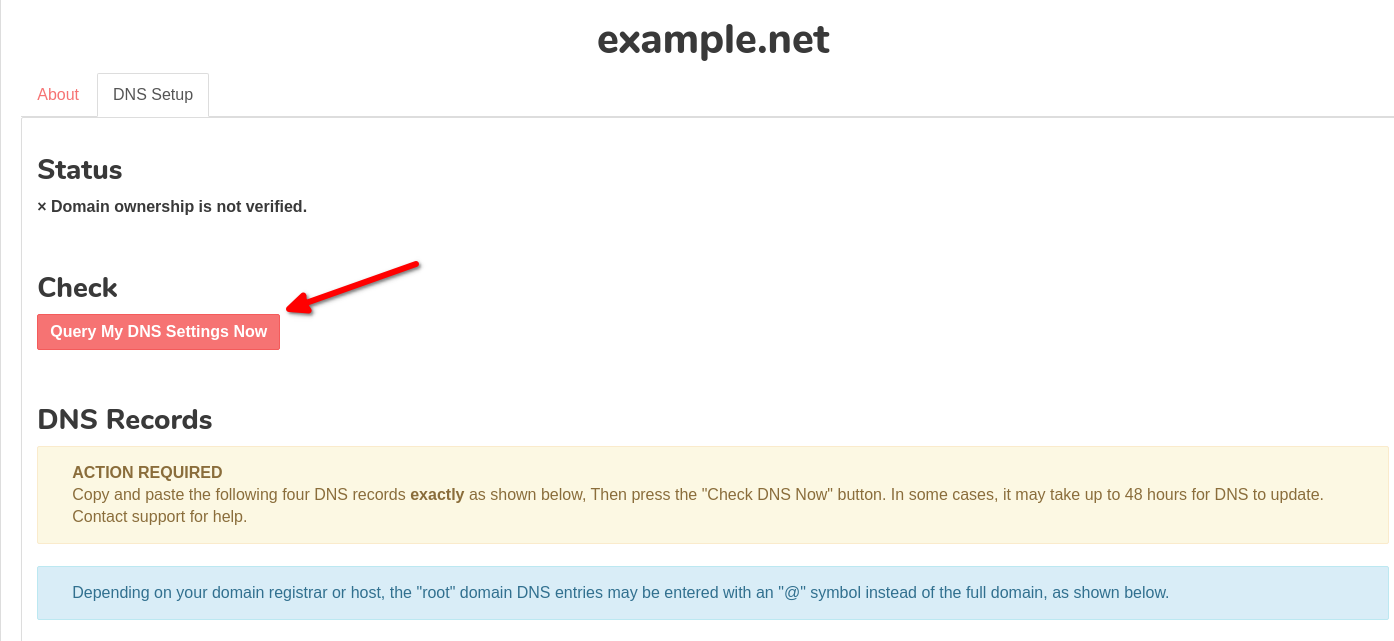
“Not Verified - Action Required” indicates DNS is not properly configured. The next section explains how to verify domain ownership.
Verify Custom Domain Ownership
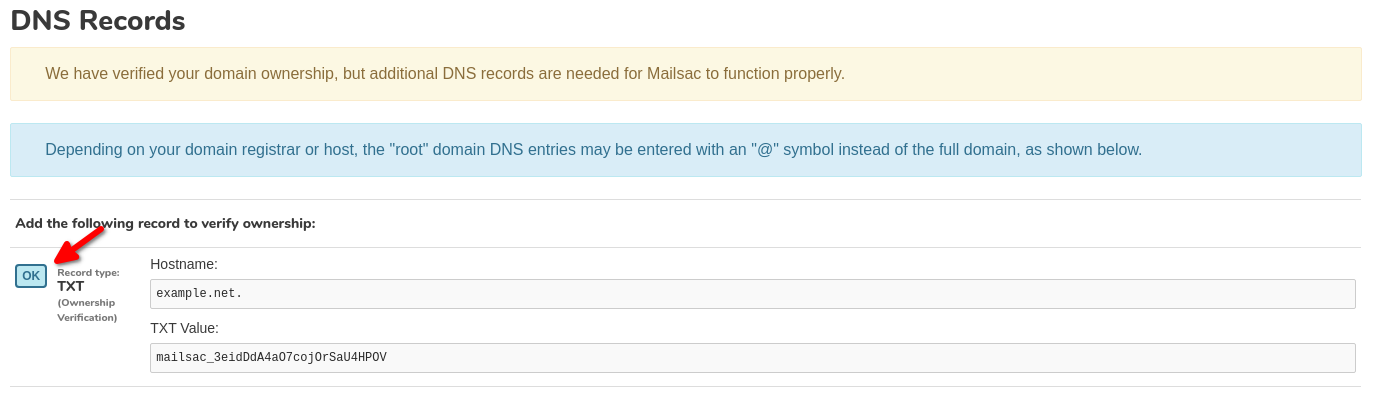
Create a TXT record with the hostname and value found on the DNS Setup page under Custom Domains.
See DNS Provider TXT Record Links for DNS provider specific instructions.
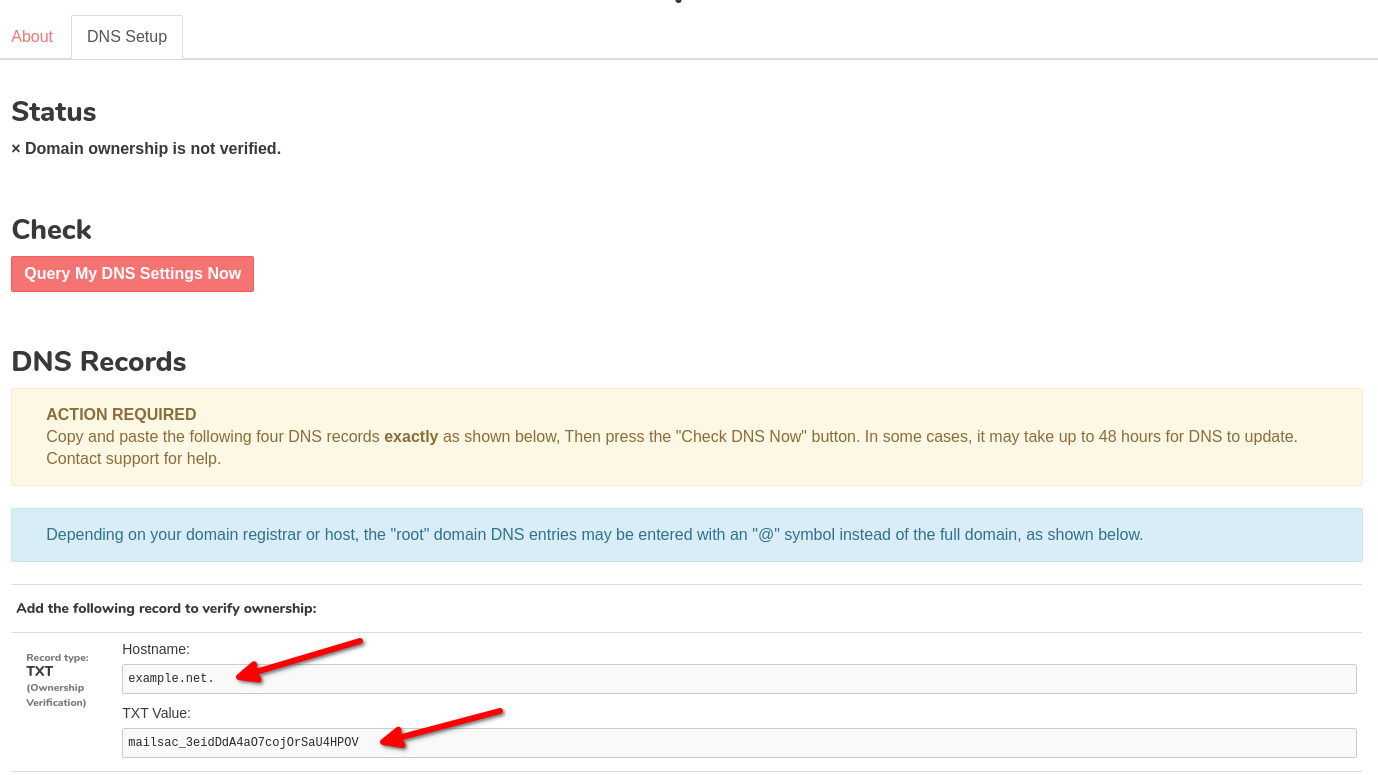
Select “Query My DNS Settings Now”
Mailsac will attempt to verify domain ownership by querying DNS records for the custom domain.
Confirm domain ownership.
If the TXT record is correct, an “OK” image will appear in the “DNS Records” section.
Note
DNS can take up to 24 hours to propagate
Configure Custom Domain for Receiving Mail
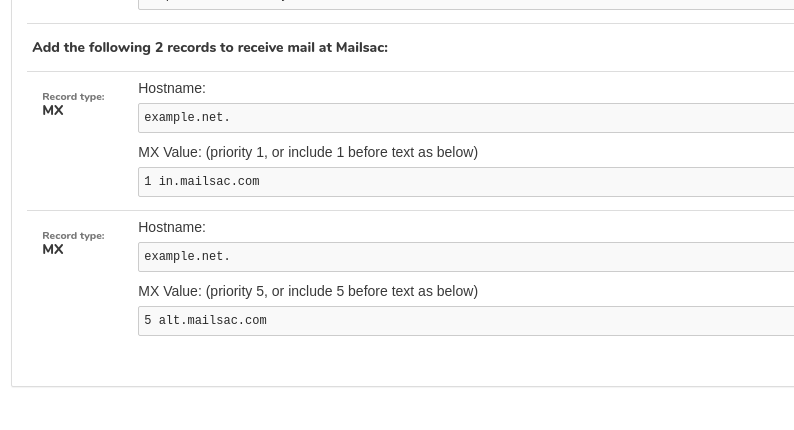
Create two MX (“Mail eXchange”) records to receive mail with the hostname and value found on the DNS Setup page under the Custom Domains page.
See Multiple TXT Records Using AWS Route53 for DNS provider specific instructions
Select “Query My DNS Settings Now”
Mailsac will attempt to verify the MX records for the custom domain.
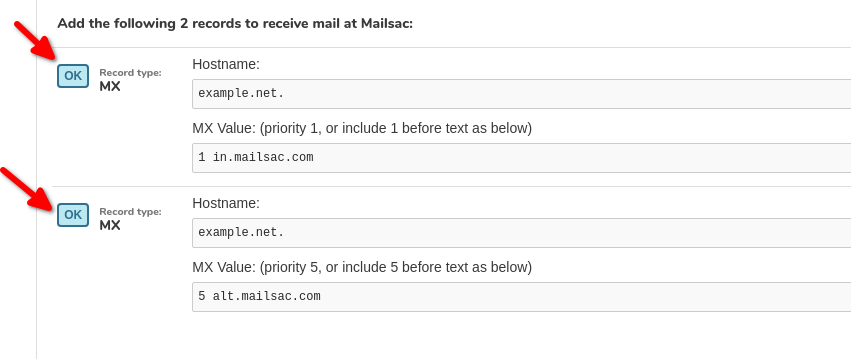
Confirm MX records.
If the MX records are correct, an “OK” image will appear next to the “MX Record Type” section of “DNS Records”
Configure Custom Domain for Sending Mail
Warning
Sending outbound SMTP email has been deprecated.
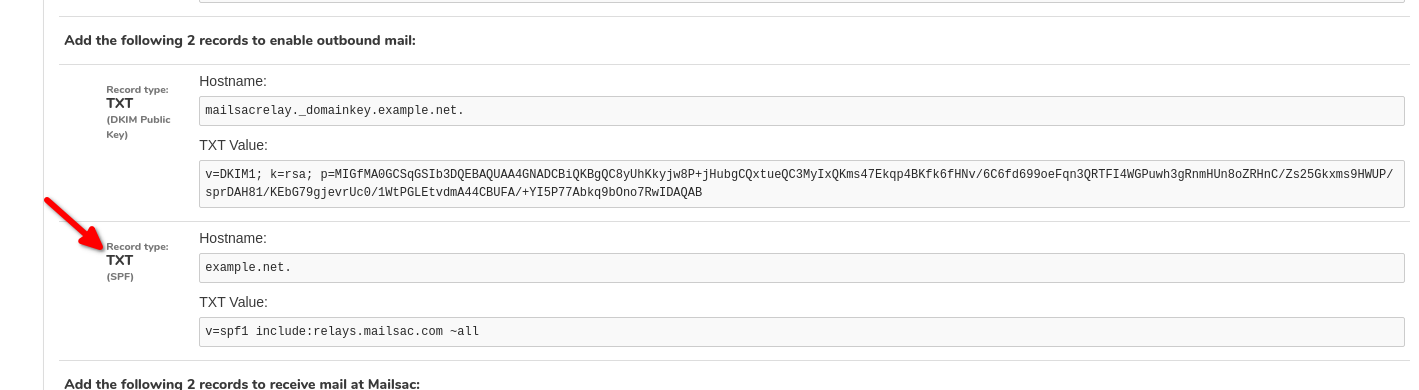
Create a TXT record for DKIM (DomainKeys Identified Mail) with the hostname and value found on the DNS Setup page under the Custom Domains page.
See DNS Provider TXT Record Links and DNS provider specific instructions
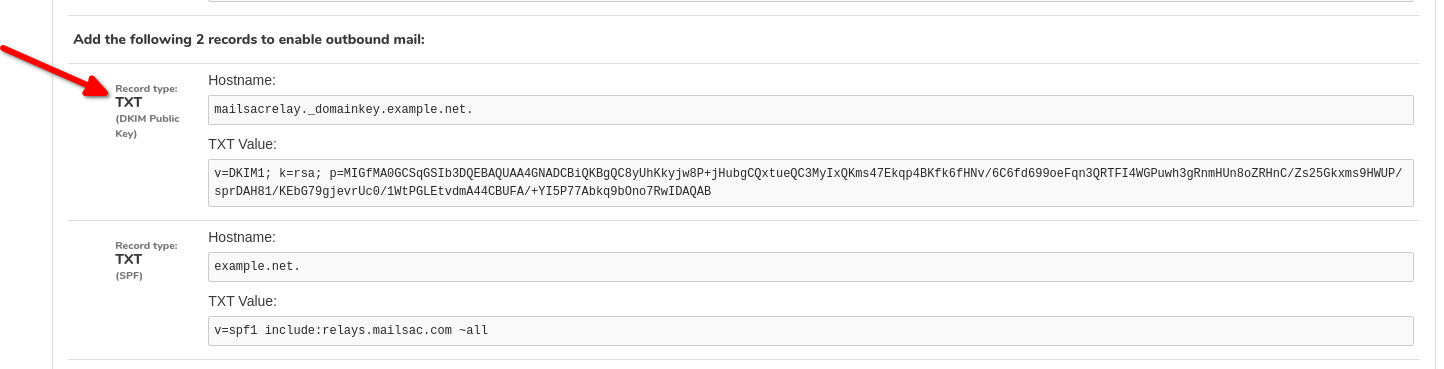
Create a TXT record for SPF (Sender Policy Framework) with the hostname and value found on the DNS Setup page on the Custom Domains page.
See DNS Provider SPF Record Links for DNS provider specific instructions
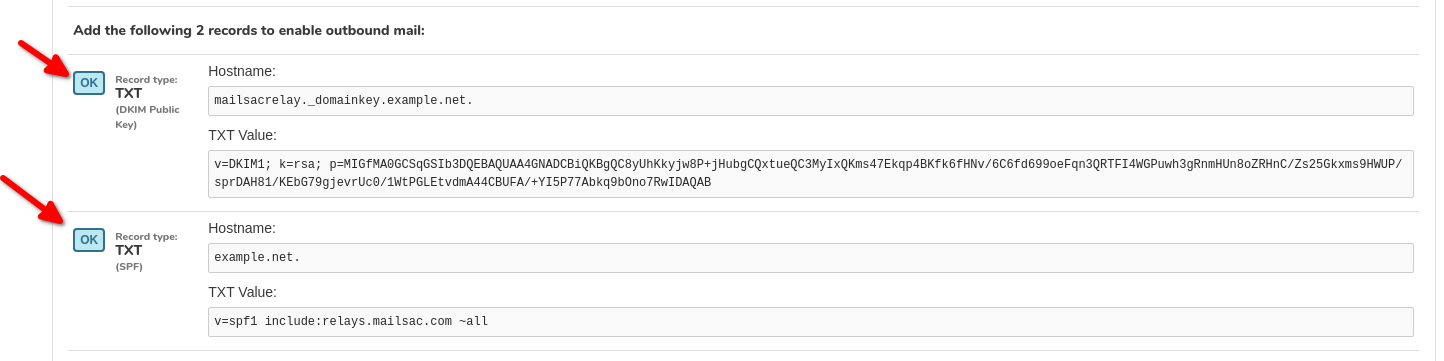
Confirm DKIM and SPF records.
If the DKIM and SPF records are correct, an “OK” image will appear next to the “DKIM Public Key” and “SPF” section of “DNS Records”
Public Custom Domains
Custom domains can be set as public. API calls for the domain, its addresses, or messages will be tracked on the domain owner’s account. Viewing message via the website do not count as an Op.
See Ops (Operations) Usage for additional details about Ops usage.
Multiple TXT Records Using AWS Route53
The TXT records to Verify Custom Domain Ownership and SPF both use top level domain as the record name. In the AWS Route53 console each value will need to be quoted and placed on a separate line.
The code sample shows how the record values should be formatted.
"mailsac_0rlzMqMyDo2wDF6FuE0x54U5"
"v=spf1 include:relays.mailsac.com ~all"`
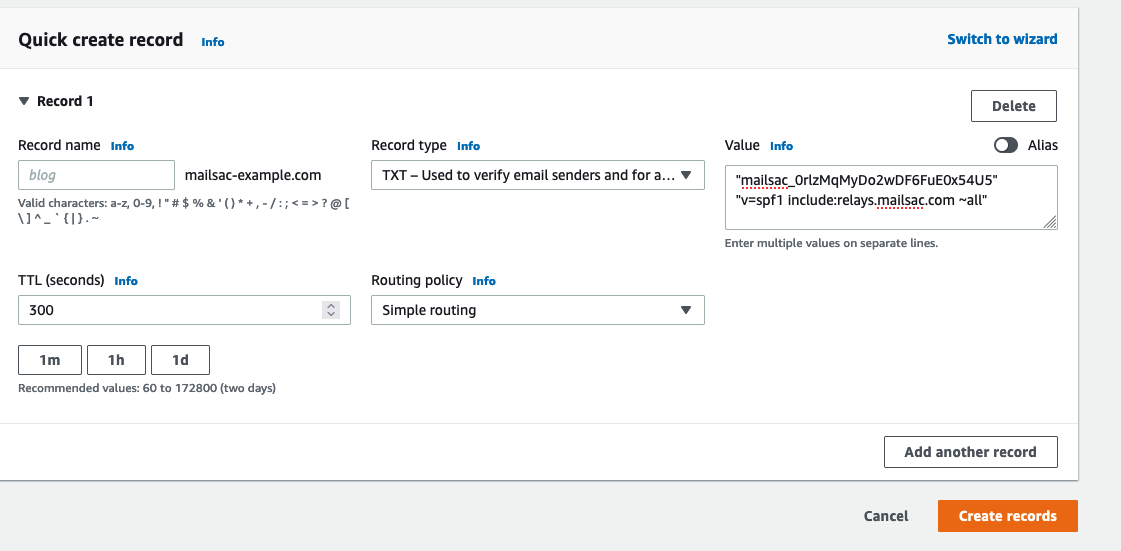
Example of formatted values in Route53 AWS Console
DNS Provider MX Record Links
DNS Provider
Documentation Link
Amazon Route 53
GoDaddy
Dreamhost
Cloudflare
HostGator
Namecheap
Names.co.uk
Wix
DNS Provider TXT Record Links
DNS Provider
Documentation Link
Amazon Route 53
GoDaddy
Dreamhost
Cloudflare
HostGator
Namecheap
Names.co.uk
Wix
DNS Provider SPF Record Links
DNS Provider
Documentation Link
Amazon Route 53
GoDaddy
Dreamhost
Cloudflare
HostGator
Namecheap
Names.co.uk
Wix